
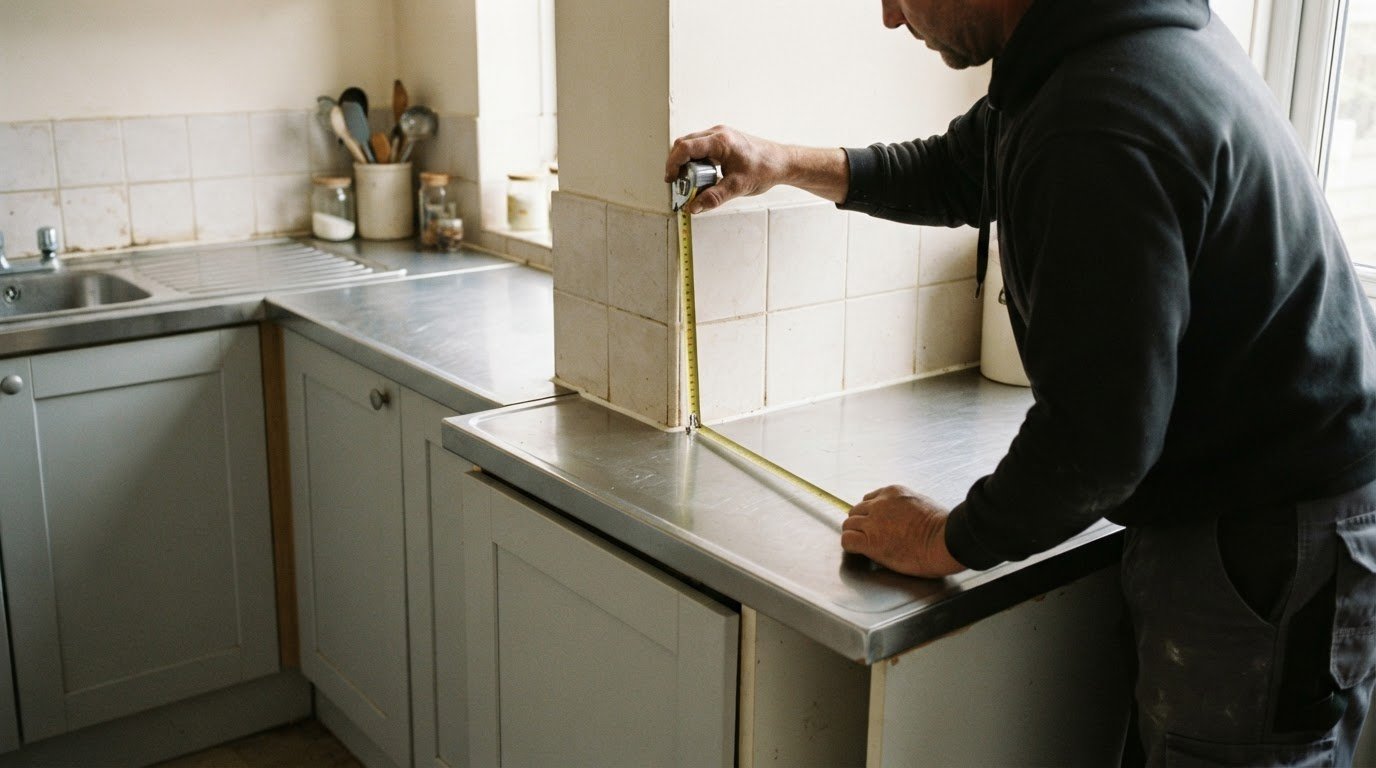
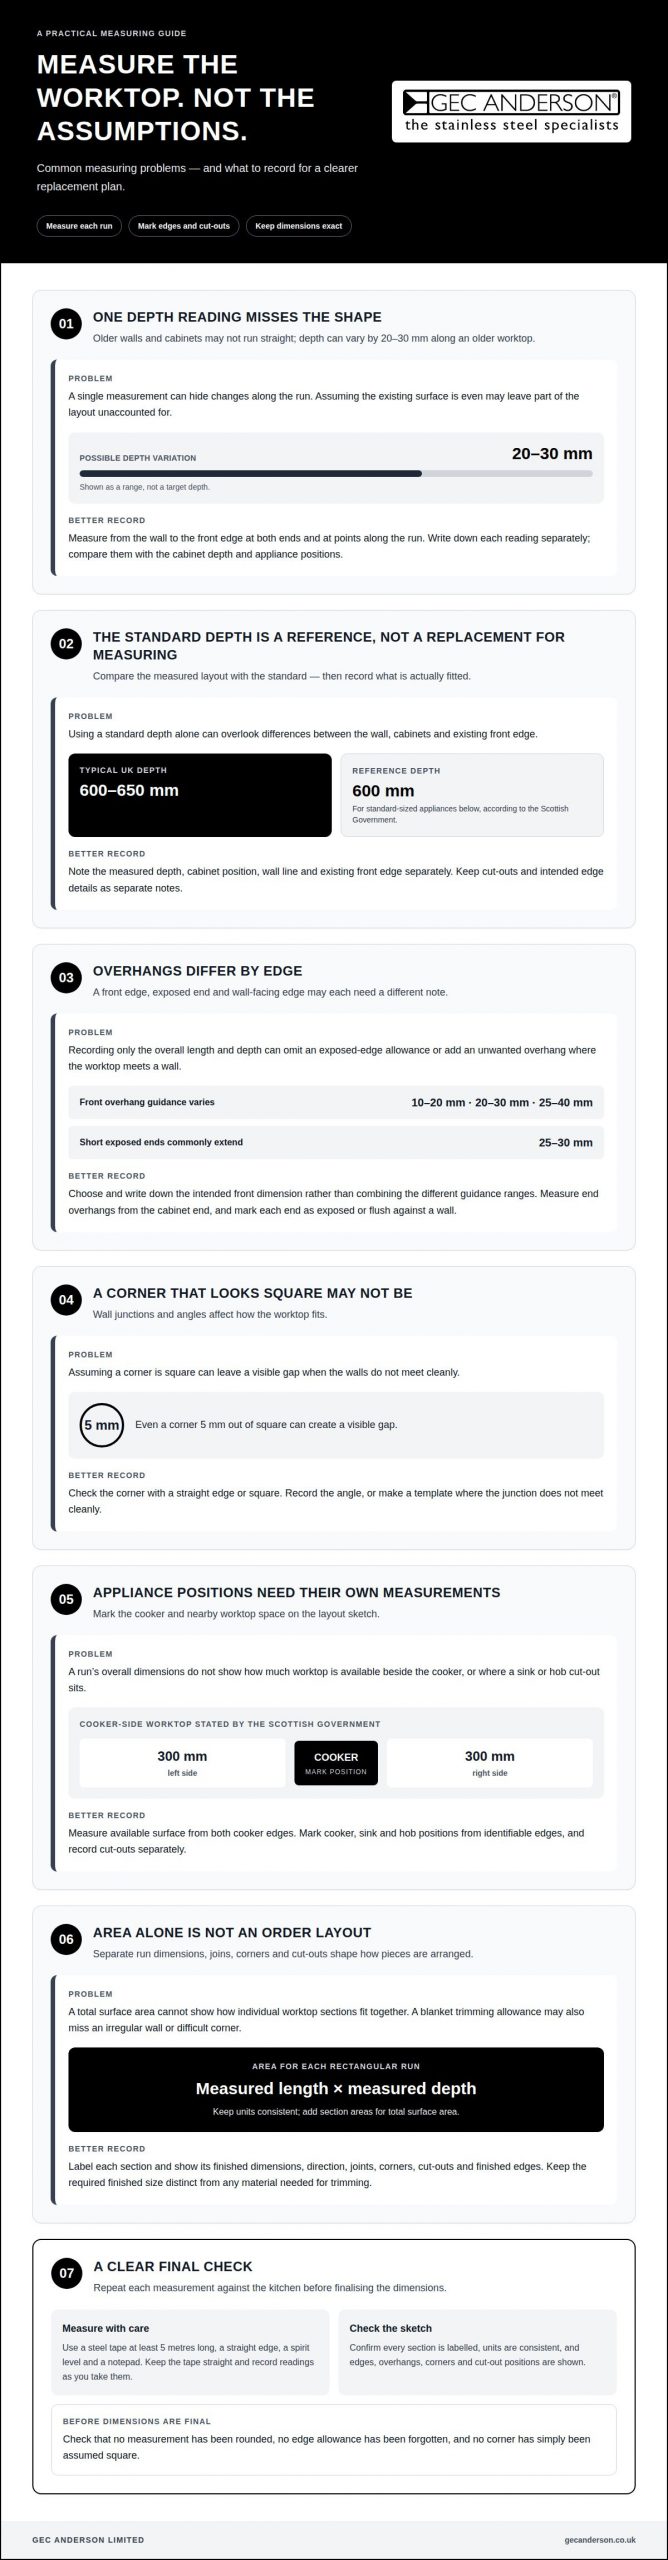
A standard depth is only a starting point: UK kitchen worktops typically measure 600-650 mm deep, but a replacement needs to suit the cabinets and walls already in place. Knowing how to measure for a kitchen worktop means recording the full length and depth, then allowing for overhangs, edges, corners and cut-outs. In older kitchens, depth may vary by 20-30 mm along the worktop, making measurements at more than one point especially useful.
When replacing a fitted worktop, the existing surface can be a useful reference, but measure the actual layout rather than assuming every section is even. Record each run’s length and depth, along with the positions of corners, sinks, hobs and exposed edges. This guide explains how to measure a kitchen worktop and prepare a clear set of dimensions for a replacement or a new layout.
Key Takeaways
- Use 600 mm as the standard worktop depth for accommodating standard-sized appliances below, according to the Scottish Government, then compare it with the existing cabinets and walls.
- Measure front and end overhangs separately, allowing for whether an edge meets a wall or remains exposed.
- Use a tape measure, straight edge and spirit level to record dimensions, and label each worktop section as you go.
- Check corners and depth at several points so uneven walls or out-of-square angles are captured in your measurements.
- For a replacement, sketch the fitted layout and record cut-outs and their positions without rounding measurements.
What Depth Is a Kitchen Worktop?
For each run, measure from the wall to the front edge, then compare the reading with the cabinet depth and appliance positions. Record the finished length and depth, and note any cut-outs separately. Worktop materials can have different fabrication requirements and edge profiles, so include the intended edge details rather than relying on the existing surface alone.
- Measure the depth at several points. Use a tape measure from the wall to the front edge at each end and along the run. Older walls and cabinets may not sit straight, so one reading can miss a change in depth. Note each measurement rather than averaging them; the difference shows where the worktop may need to follow an uneven surface.
- Compare the result with the standard depth. Standard kitchen worktops should be 600 mm deep to accommodate standard-sized appliances below them, according to the Scottish Government. Treat this as a reference, not a substitute for measuring the fitted kitchen. Record the cabinet position, wall line and existing front edge separately so their relationship remains clear.
- Check the cooker position. The Scottish Government states that cookers should have 300 mm of worktop available on both sides. Measure the available surface from the cooker’s left and right edges, and mark the cooker position on the sketch. This check identifies whether the measured run provides the required adjacent worktop space.
- Check corners rather than assuming they are square. Place a straight edge or square against the corner and compare the two wall directions. Most kitchen corners are 90 degrees, but a corner 5 mm out of square can create a visible gap. Record the angle or make a template where the junction does not meet cleanly.
- Calculate area by section. For each rectangular run, multiply its measured length by its depth, keeping units consistent. Add the section areas for a total surface area; for example, convert all measurements to metres before calculating square metres. Area is not, by itself, an order layout: section lengths, joints, corners and cut-outs affect how pieces are arranged.
- Review the order details before submitting them. Compare the sketch with the kitchen, then repeat each length and depth measurement. Check that units are consistent, each section is labelled, and sink, hob and cooker positions are marked from identifiable edges. Common mistakes include measuring only one point, rounding a measurement, forgetting an overhang, or assuming a corner is square. Correct those omissions before sending dimensions for fabrication.
Measuring overhangs and decorative edging
Record each edge separately: the front, exposed ends and wall-facing sides may need different finishes. Note which edges will be visible and describe the profile or finish required for each.
Measure the worktop overhang
- Measure each exposed edge from the cabinet line. At the front, compare the cabinet face with the intended worktop edge. Common front-overhang guidance varies: figures include 10-20 mm, 20-30 mm and 25-40 mm, with the larger range depending on preference and whether there’s a breakfast bar. Choose the intended design dimension and record it rather than combining these ranges.
- Record end overhangs separately. Short ends commonly extend 25-30 mm beyond the cabinets, except where the worktop finishes flush against a wall. Measure from the cabinet end to the planned worktop edge, and mark each end as exposed or wall-flush on the sketch. This prevents an end allowance being applied where the surface must meet a wall.
Allow for edging, waste and trimming
- Mark the finished edge and its treatment. Identify which sides remain visible and which meet walls, cabinets or adjoining pieces. Note whether the edge should be decorative, square or finished to match another surface. A plan that records only the overall length and depth can omit the material needed at an exposed end or include an unwanted overhang at a wall.
- Allow for trimming according to the layout. There’s no single extra amount that suits every worktop: the allowance depends on the measured shape, uneven walls, corners and the cuts needed. List each section’s finished dimensions, then show where trimming is required. Keep the required finished size distinct from any extra material needed to achieve it.
- Check the cutting plan before calculating order size. Separate runs, angled corners and cut-outs can affect how the pieces fit within the material. Mark the direction of each length and the location of every finished edge. Avoid adding a blanket allowance without considering the layout, as it may not account for a difficult corner or an irregular wall.
- Review edging against the final position. Trace the cabinet line and wall line on the sketch, then compare them with the planned finished edge. Confirm exposed ends have the intended overhang and wall-facing edges do not. For a design using stainless steel worktops, include these edge and position details in the dimensions so the specified finish relates to the actual layout.
Tools and materials for measuring
Set out a tape measure, spirit level, straight edge and notepad before measuring. Each tool records a different feature, from a run’s length to the level of its surface.
- Choose a steel tape measure that reaches across the full run. A steel measuring tape should be at least 5 metres long. Check that its hook moves freely and the markings are readable. Keep the tape straight against the surface rather than letting it bow, as a curved tape can distort the reading. Record the measurement as soon as you take it.
- Use the tape’s end consistently. Seat the hook against the same reference point for each reading, such as the cabinet end or wall line. Pull the tape taut without forcing the hook or stretching the blade. For a length, keep it parallel with the worktop’s front edge; for depth, position it from the back edge towards the front.
- Set a straight edge along the surface. Place it across the worktop or against the wall to reveal changes in alignment. A gap between the straight edge and the surface can show where the wall or worktop deviates. Note the location and direction of that variation on the sketch, rather than relying on a single measurement.
- Check level with a spirit level. Place the level on the worktop in more than one direction, including along its length and across its depth. Record where the bubble sits if the surface slopes or changes along the run. This gives context to the dimensions and helps distinguish an uneven surface from a measurement taken at an angle.
- Prepare a notepad and a clear sketch. Draw each worktop run separately and label it with its location, such as the cooker wall or sink run. Write each measurement beside the matching line, including whether it records length, depth or a local variation. Mark the front edge consistently so readings can be understood later.
- Keep units and notation consistent. Write the unit beside the first measurement on each sketch, then use the same unit throughout that set. Record small differences clearly rather than rounding them into the main dimension. If a reading changes along a run, note its position, such as near the corner or at the centre.
- Review the tools and notes before finishing. Repeat any reading where the tape slipped, the straight edge moved or the level was difficult to read. Compare the written dimensions with the labelled sketch, then make sure every section has a length and depth entry. A complete record links each measurement to the correct worktop area.
Identifying sections, corners and uneven areas
Divide the worktop into individual runs before recording dimensions. For an L-shaped layout, measure both connected runs; for a U-shaped layout, record all three separately.
Identify separate worktop sections
- Label each run on a sketch. Start with one end of the kitchen and mark each continuous section in order, such as “sink run” or “return”. This makes it easier to match every measurement to its position. Label the two runs in an L-shaped layout and the three runs in a U-shaped layout separately.
- Record each run from end to end. Measure the full length of each section, including the distance to its corner connection. Show where one run meets another, rather than combining the lengths into a single total. This prevents the corner from disappearing in the overall measurement and makes the planned layout easier to interpret.
- Mark changes in direction and interruptions. Draw the sink, hob or other cut-out in its actual section, and note which edge it sits nearest. Add the position of any separate worktop piece or break in the run. A sketch showing each feature beside its section is more useful than a list of dimensions without locations.
Locate corners and uneven areas
- Identify every internal and external corner. Mark whether the worktop turns into the kitchen or projects out from it. Measure the wall directions meeting at each corner, rather than assuming they form a right angle. Most kitchen corners are 90 degrees, but a corner 5 mm out of square can leave a visible gap.
- Check for changes along the wall and cabinet line. Place a straight edge against the wall or existing surface and note where it stops sitting flush. Older worktops can vary in depth by 20-30 mm along their length. Record the location of each variation, such as beside a corner or near the centre of a run.
- Note the size and direction of each irregularity. Write whether the wall moves inwards or outwards and mark the point where that change begins. Avoid replacing several readings with one average, as it can hide the area that needs shaping. A clear note such as “wall bows in near corner” links the observation to the correct section.
- Review the complete plan. Trace each run from its starting end, through its corners, to its finishing end. Confirm every section has a label, a length and notes for its junctions or uneven areas. This final visual check helps reveal a missing return or a corner measurement assigned to the wrong run before dimensions are used.
Measuring a fitted kitchen when replacing a worktop
For a replacement, measure the kitchen in its current fitted arrangement instead of relying on standard dimensions. Label each measurement on a sketch and distinguish the existing layout from the finished worktop requirements. Knowing how to measure for a kitchen worktop starts with the actual positions of the cabinets and walls.
- Sketch the existing layout before taking measurements. Mark each run, corner, wall and cabinet position, then label the sections clearly. For a like-for-like replacement, use the old worktop as a reference, but measure every section separately. This helps identify changes in the layout instead of relying on one overall length that could conceal a return or corner.
- Measure only once the cabinets are in their final position. Kitchen units should be fitted and settled where they will remain before worktop dimensions are taken. If you’re keeping existing cabinets, record the height from the floor to their tops. These readings show the actual supporting arrangement. Measurements taken before units are positioned may no longer match the finished kitchen.
- Record each length without rounding. Measure each run from end to end and write down the exact reading. For example, record 1,200 mm as 1,200 mm rather than rounding it to a convenient figure. Keep connected runs separate, so the corner or return remains visible in the notes. That detail makes the layout easier to interpret later.
- Measure depth from the wall to the current front edge. Take readings at several points, particularly where the wall line changes. Some worktops sit 50 mm away from the wall to accommodate skirting boards. Note any gap and allow extra depth where an uneven wall may require trimming. This records the fitted condition rather than an assumed straight wall.
- Locate appliance and sink openings from fixed references. For each sink, hob or appliance cut-out, record its width and depth. Also note the distance from the worktop edges to the appliance centre. Mark which run contains each opening. These positions help turn measurements into a clear plan, rather than a set of dimensions with no indication of where each cut-out belongs.
- Keep units and notation consistent. Record the main worktop dimensions in centimetres, then use millimetres for small variations and cut-out positions. Write the unit beside the relevant figures, and distinguish finished dimensions from local details. A clear notation system is part of how to measure for a kitchen worktop accurately, especially when several runs and openings appear on one sketch.
- Repeat the measurements before finalising the order details. Measure each section twice, then compare both readings with the sketch. Confirm every run, wall gap and opening has a matching note. Check that the layout follows the cabinets as they stand, not a remembered or planned position. This final review can reveal a missing dimension before the information is used for production.
For a replacement layout requiring a made-to-measure surface, explore made-to-measure worktop options.
GEC Anderson Limited
GEC Anderson Limited supplies stainless steel worktops for kitchens planned around measured dimensions and practical requirements. Its worktops are available as standard, modular or made-to-measure options, making them relevant for both straightforward replacements and layouts with distinctive sections or corners. Stainless steel sinks can also be considered alongside the worktop, with stainless steel cabinets and doors or shelving for projects requiring coordinated components. Share your layout, measurements and intended arrangement to help define the products suited to your kitchen. For a considered approach to a new or replacement stainless steel surface, contact GEC Anderson Limited to discuss your requirements.
Turn your measurements into a considered design
The worktop measurements are a practical starting point for deciding how the finished kitchen should function and feel. Once you’ve recorded the existing layout, consider how the surface, sink and surrounding storage will work together. The care taken in how to measure for a kitchen worktop can inform those choices, helping you discuss a design that fits the room rather than relying on assumptions. For homeowners coordinating a broader refurbishment that extends to exterior features or replacement glazing around the space, residential contractors such as Galaxy Home Remodeling demonstrate how precise planning across every element keeps a full renovation cohesive.
GEC Anderson Limited supplies stainless steel worktops, sinks, cabinets and doors. Your measurements and notes provide a useful starting point for discussing how these products can work together in a replacement or new kitchen layout.
Contact GEC Anderson Limited to discuss your kitchen plans and take the next step towards a carefully considered fit.
Frequently Asked Questions
What tools do I need to measure a kitchen worktop?
Use a steel tape measure, pencil, notepad, straight edge and spirit level. A tape at least 5 metres long can span many kitchen runs without resetting, while a straight edge helps identify where a wall or surface changes direction. Keep a sketch beside your notes and label each measurement immediately. If a corner or cut-out has an irregular shape, a paper or card template can help record its outline.
How do I measure worktop length and depth accurately?
Measure each run between clear reference points, such as the end of a wall and the edge of a cabinet. Keep the tape aligned with the run, then measure from the back edge to the front edge for its depth. Note where each measurement starts, such as the wall or the gap behind the surface. Where the wall line changes, take separate readings and show them on your sketch.
How should I measure corners, walls and out-of-square areas?
Mark each wall direction and the corner junction on your sketch rather than assuming the corner is square. For an irregular corner, make a card template by holding the card against the wall and cabinet line and tracing the shape. Label the edges, orientation and worktop section it belongs to. This can clarify a corner that is difficult to describe using length measurements alone.
How do I measure around sinks, hobs and other cut-outs?
Record each opening’s width and depth, then locate it from identifiable worktop edges. For example, note the distance from the front edge and the end of the run to the opening’s centre. Distinguish the cut-out dimensions from the outside dimensions of the sink or hob. Label each opening by its section and purpose to avoid confusing a sink position with a hob position on another run.
Should worktop overhangs and end panels be included in measurements?
Yes. Record the cabinet dimensions and intended finished worktop dimensions separately, showing the front overhang and any exposed ends. Mark wall-facing edges that should sit flush, and identify the edges that need a finished or decorative treatment. If an end panel affects the visible line, show its position on the sketch rather than including it without explanation in the worktop length.
Should I measure before or after fitting kitchen cabinets?
Measure after the cabinets are installed in their final positions, because their alignment determines the worktop’s supporting outline. If you are planning a replacement before fitting new units, treat earlier measurements as provisional. For an existing kitchen, note whether cabinets or panels will move, since a changed cabinet line can alter the finished dimensions.
Should a UK worktop supplier or installer verify measurements before ordering?
For a straightforward replacement, a complete, carefully checked measurement record can establish the required dimensions. A measuring service can be useful when the layout has complex corners, unusual wall lines or made-to-measure details. GEC Anderson Limited offers measuring and installation services alongside its stainless steel worktops. The right level of support depends on the layout and the information needed to prepare the worktop for production.
How do measurements differ for laminate, wood, quartz and stone worktops?
Worktop materials can have different edge profiles and fabrication requirements. Along with each section’s length, depth and cut-outs, record the intended edge details; for instance, design and fabrication teams such as Countertops and Cabinetry By Design emphasise factoring in template allowances and joint positions when planning custom surfaces alongside surrounding cabinetry.