
The most hygienic laboratory work surfaces are those suited to the work carried out on them. Compare materials by cleanability, compatibility with the chemicals and disinfectants in use, durability under daily conditions, and suitability for the setting. The right choice depends on the combination of these demands, not on one feature alone.
A surface that is straightforward to clean can support routine hygiene, but it also needs to withstand the substances and working practices it encounters. Chemical compatibility matters: the cleaning agent must suit both the material and the contaminant, while the finish and construction should suit the demands of the space.
This guide explains how to assess surface materials for hygiene, chemical compatibility and long-term use. It also considers how priorities differ between clinical and research settings, and what to weigh when planning a laboratory work area. The aim is to help you specify surfaces with a clear understanding of their practical strengths and limitations.
Key Takeaways
- Assess benches alongside walls, floors and ceilings, since each surface has a different role in keeping a laboratory clean and practical.
- Match cleaning agents to both the material and the substances being removed; chemical compatibility is central to protecting worktops over time.
- Plan clear cleaning routines, prompt spill response and uncluttered work areas to support consistent hygiene and safer work.
- Choose surfaces around the work taking place, including the cleaning demands of clinical settings and the chemical exposure of research environments.
- Consider how surfaces will withstand regular use and where protective measures may help in areas exposed to more demanding conditions.
1. Hygienic wall, floor, ceiling and benchtop materials
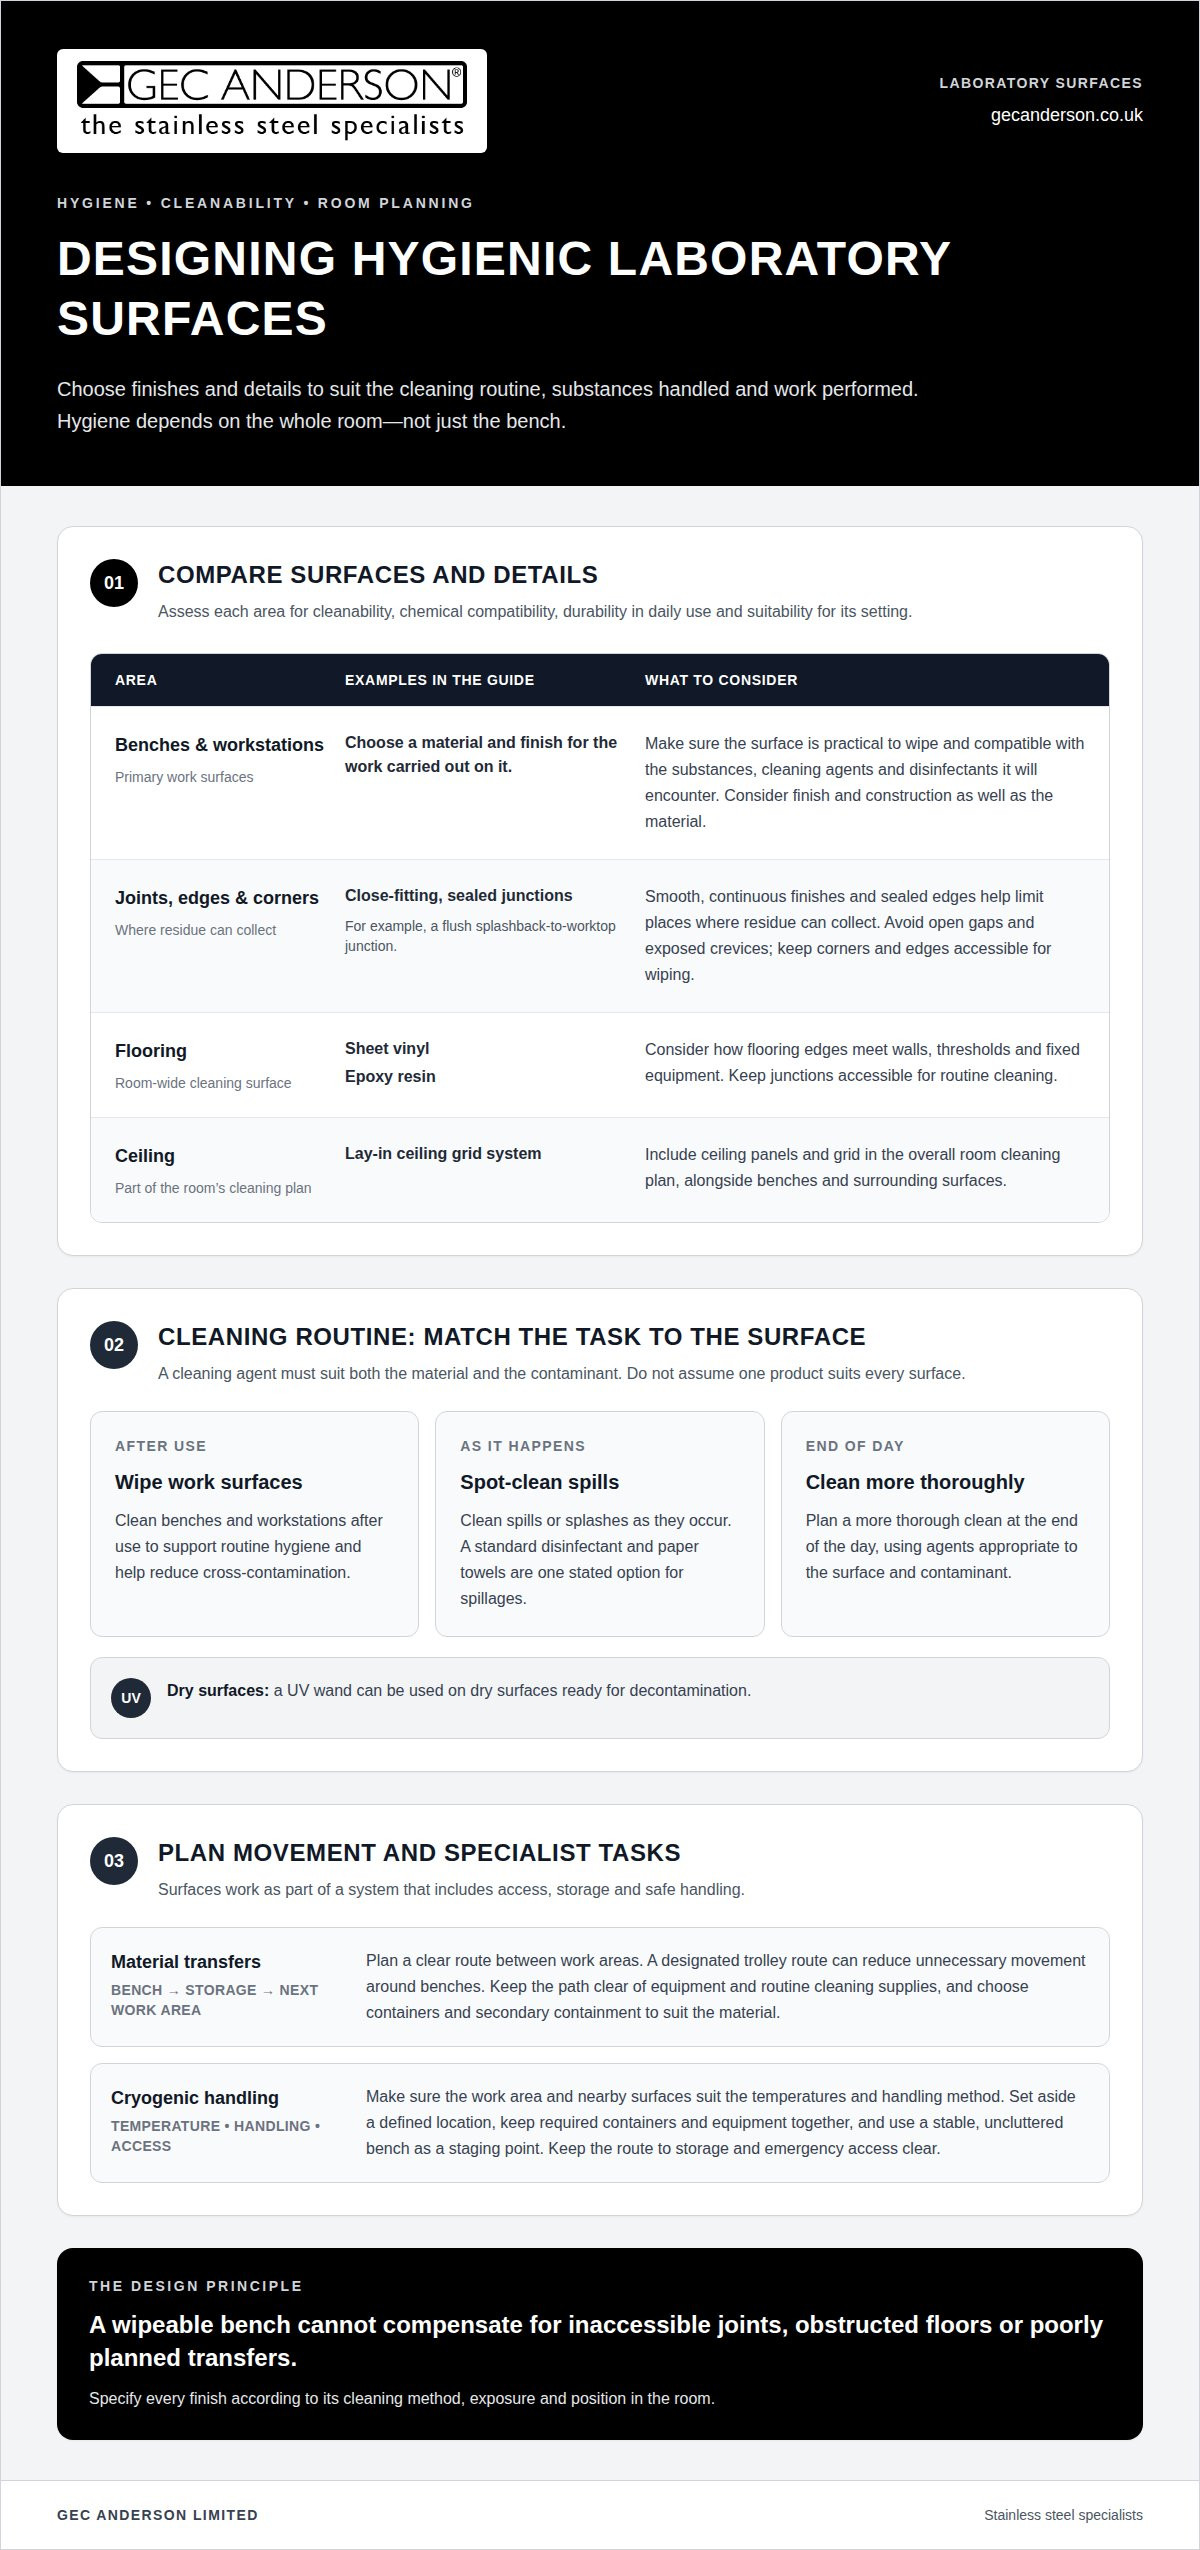
Laboratory hygiene supports reliable work with specimens and research samples. Benches, workstations and surrounding surfaces need cleaning after use to help reduce cross-contamination. Choose materials that suit the cleaning routine, substances handled and work performed. A surface should be practical to wipe, with its finish and joints considered alongside the material itself.
Smooth, continuous finishes and sealed joints help limit places where residue can collect. Specify close-fitting junctions between benches and walls, with sealed edges rather than open gaps or exposed crevices. Corners and edges should remain accessible for wiping. For example, a flush splashback-to-worktop junction is easier to clean than a narrow, inaccessible gap.
Flooring also affects day-to-day cleaning. Sheet vinyl and epoxy resin are examples of laboratory flooring finishes. Whichever finish you choose, consider how its edges meet walls, thresholds and fixed equipment. Keep those junctions accessible for routine cleaning. Lay-in ceiling grid systems are one example of a ceiling arrangement; their panels and grid form part of the room’s overall cleaning plan.
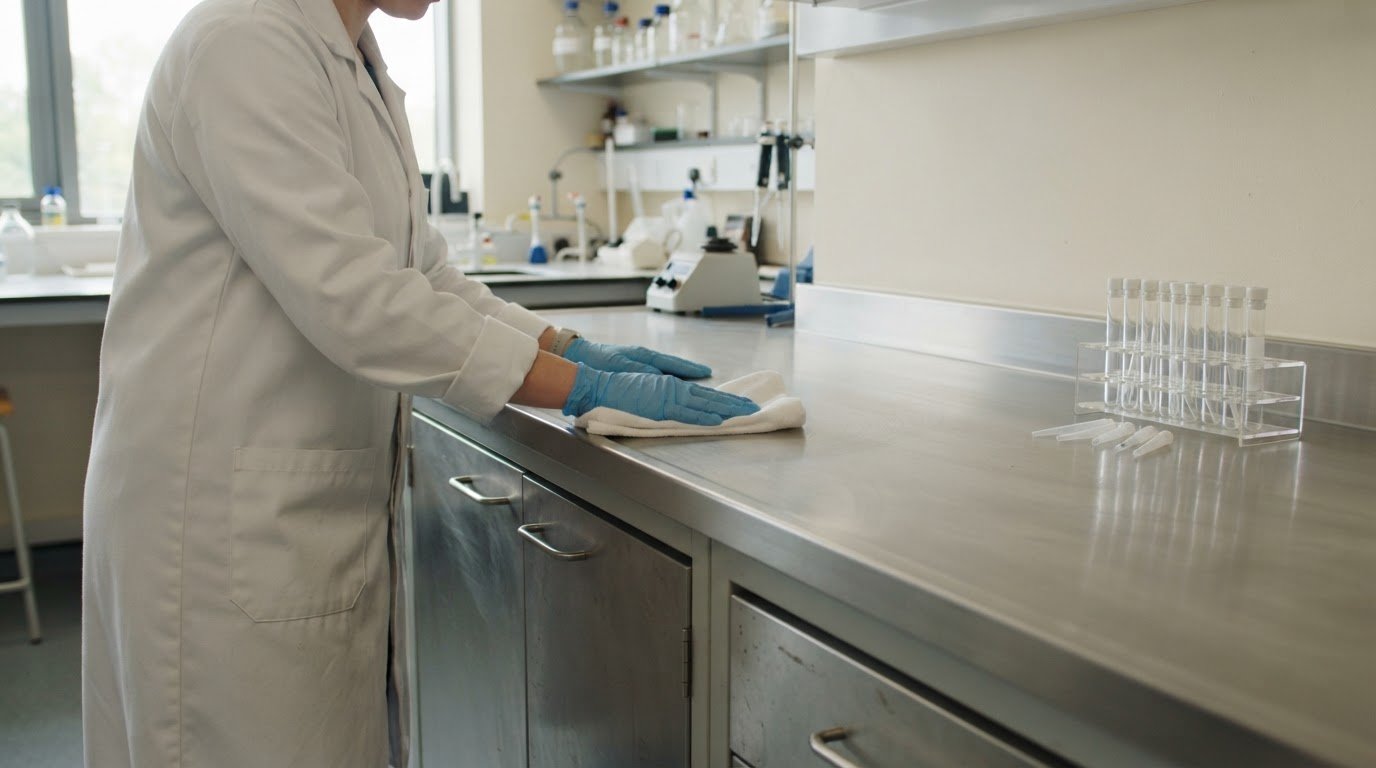
Wipe work surfaces after use, and spot-clean spills or splashes as they occur. A more thorough clean belongs at the end of the day. A standard disinfectant and paper towels are one stated option for spillages. A UV wand can be used on dry surfaces ready for decontamination. Match the cleaning agent to the surface and contaminant, rather than assuming one product suits every material.
Transporting research material also needs to be considered in the room layout. Plan a clear route between the workbench, storage and the next work area. For example, a designated trolley route can reduce unnecessary movement around benches. Keep the transfer path clear of equipment and routine cleaning supplies. Select the container and any secondary containment to suit the material being moved.
Cryogenic material handling brings another design consideration: the work area and nearby surfaces must suit the temperatures and handling method involved. Set aside a defined location for the task, with the required containers and equipment kept together. For example, a stable, uncluttered bench can provide a controlled staging point before material is transferred. Include the route to storage and any emergency access in the layout, so equipment does not obstruct movement.
These choices work as a system. A wipeable bench cannot compensate for inaccessible joints, obstructed floors or poorly planned transfers. Specify each finish according to its cleaning method, exposure and position in the room. This helps make routine cleaning and careful material handling part of the laboratory design.
2. Laboratory design and safety
In the UK, the Health and Safety at Work Act and COSHH require employers to assess workplace risks, implement control measures and train staff in safe use of cleaning agents and hazardous substances. These duties affect laboratory layout as well as daily routines. HSE Biosafety Guidance also provides direction on biological risks, containment measures and safe laboratory procedures.
Start a design review by mapping tasks, equipment and movement through the room. Keep benches and walkways clear, with enough space to operate equipment and move safely. For example, locate frequently used tools near their work area while keeping emergency equipment accessible. Eyewash stations, safety showers, spill kits and fire extinguishers should not be blocked by deliveries or stored items.
Training should connect the risk assessment with the work staff actually perform. Cover the safe use of cleaning agents, hazardous materials, appropriate PPE and local spill procedures. Safety glasses must be accessible, clean, well maintained and suitable for the level of risk. Include practical instruction on cleaning down a work area and leaving it safe when a task ends. Refresh those practices when tasks or materials change.
Signage can make hazards and emergency arrangements visible at the point of use. Use clear signs to identify designated areas, relevant PPE and the location of safety equipment. For example, a sign beside a chemical storage cabinet can remind staff of the area’s hazards and required precautions. Keep signs unobstructed and consistent with the laboratory’s actual procedures, equipment and stored materials.
Gas cylinders need a defined storage and use arrangement within the laboratory plan. Position them so they don’t obstruct walkways, emergency access or equipment operation. Make the location and contents identifiable, and keep cylinder handling within staff training. University of Bath laboratory safety guidance says gas cylinder regulators should be replaced every five years in accordance with BCGA Guidance Note GN7.
Electrical equipment also needs a considered position. Keep cables away from walkways, wet work and routine cleaning routes; for example, avoid trailing leads across a bench-to-sink path. Store chemicals in properly labelled containers and appropriate cabinets. Segregate chemical waste, biological waste and sharps into suitable containers. These arrangements reduce clutter, help limit contamination and make hazards easier to recognise during work.
Good design supports safe conduct, but it works alongside cleaning and task-specific controls. Clean work surfaces and equipment with appropriate disinfectants when handling biological agents. Take care to reduce contamination risks when handling potentially infectious materials. Together, layout, training, signs and accessible emergency equipment help reduce accidents and support consistent laboratory practices.
3. Chemical resistance in laboratory worktops
A worktop’s chemical compatibility depends on the material and the substances used on it. The same surface may encounter reagents during experiments, then disinfectants during cleaning. Consider each exposure, including its concentration, contact time and temperature. A brief splash and prolonged contact create different demands, so assess the actual procedures rather than relying on a broad label such as “chemical resistant”.
Start with an inventory of chemicals used at each workstation. Include routine cleaning products, occasional reagents and materials handled during spill response. For example, a bench used for solvent preparation needs a different compatibility review from one used mainly for sample sorting. The manufacturer’s guidance can help match a material to the chemicals and cleaning methods used in that setting.
Then define what the worktop must withstand. Record likely contact conditions and how staff remove spills. Check whether the cleaning agent is suitable for both the worktop and the contaminant. A product that removes a residue may still be unsuitable for a particular surface. Follow the surface and cleaning-product instructions, and avoid substituting a stronger agent without assessing compatibility.
Surface condition matters too. Scratches, damaged edges or failed seals can complicate cleaning and expose areas to repeated contact. Include joints, upstands, cut-outs and sink interfaces in the assessment, not just the main worktop area. For instance, a chemical used near a sink may reach the junction during routine work. A clear specification should state the expected exposure and cleaning process for each area.
Stainless steel worktops are one option to assess for laboratory settings. Their suitability still depends on the chemicals, contact conditions and cleaning routine involved. Treat chemical compatibility as a material-specific question, not a universal property of a material category. If work changes, such as the introduction of a new reagent or disinfectant, review compatibility before using it on the surface.
How much do laboratory worktops cost in the UK? There is no single price for every specification. The material, dimensions, edge details, cut-outs and sink requirements all affect the specification and resulting cost. A straightforward run and a worktop with several integrated features are different projects.
For a useful comparison, prepare a schedule covering each work area, its chemicals, cleaning products, dimensions and required interfaces. Separate routine exposure from spill scenarios, then assess materials against both. This gives the specification a practical basis: the selected worktop must suit the work, cleaning routine and features fitted around it.
Note the material and cleaning requirements for each area. Laboratories should select cleaning agents suited to the materials and contaminants being treated. Keep comparisons tied to the intended use, rather than assuming one cleaning product or surface is suitable everywhere. Include the expected spill response and routine cleaning approach when requesting quotations, so suppliers can assess the same requirements. Before settling the specification, confirm that the proposed surface and cleaning process suit the chemicals used in each area.
4. Choosing surfaces for clinics and research laboratories
Begin with the work carried out at each bench. A clinic handling patient specimens has different routines from a research laboratory using varied substances. List the tasks, cleaning products and likely spills for each area. Then assess the surface against those conditions, including the equipment and storage positioned nearby.
How do stainless steel, epoxy resin and phenolic resin worktops compare? Assess them against the same criteria: chemical exposure, cleaning routine, joint details, intended use and maintenance. No material is the right choice for every laboratory; the deciding factors are the substances handled and the surface’s compatibility with them.
For clinical environments, include the cleaning protocol in the specification. Healthcare laboratories should account for applicable cleaning requirements when specifying worktops. Consider how staff can wipe the worktop, reach its edges and clean around equipment. For example, a frequently used specimen bench needs a clear cleaning sequence that fits its actual layout.
Research laboratories may handle a broader range of chemicals or procedures. Map each activity to its bench, then record which substances are used, how spills are managed and which disinfectants are applied. A worktop used for sample preparation may face different exposure from a surface used for instrument setup. Assess each location according to its conditions.
Include fixtures and storage in the decision. A sink, cabinet or shelving unit can affect how staff reach the work surface and clean around it. For example, supplies stored beside a preparation area should not obstruct access to the bench. Keep the layout clear enough for staff wearing gloves to carry out tasks without moving unnecessary items.
Build the comparison around practical questions:
- Which chemicals and cleaning agents contact the surface?
- Can staff reach edges, joints and adjoining fixtures during cleaning?
- Does the worktop suit the tasks and equipment assigned to that area?
- Can spills be identified and dealt with immediately under local procedures?
Record the answers by work area, rather than selecting one finish for the entire laboratory by default. A clinical room and a research room may need different specifications, even within the same facility. This comparison also helps identify where one material can serve several tasks and where a dedicated surface better suits a particular procedure.
Finally, align the specification with the laboratory’s cleaning schedule and staff practices. The chosen surface must suit both routine use and the products used to clean it. A clear record of tasks, substances, cleaning methods and adjoining fixtures gives designers a sound basis for selecting materials across clinics and research laboratories.
Laboratory hygiene is important for protecting the validity of results when handling specimens or samples and conducting research. Keep that priority central to every cleaning schedule.
5. Durability and repairability
Durability depends on the worktop material, its support and the conditions in the facility. Daily equipment movement, chemical contact and repeated cleaning can affect the surface. For example, a bench used for reagent preparation faces different demands from one used for paperwork. Assess likely impacts and exposure alongside the planned cleaning routine.
Damaged, porous or poorly sealed work surfaces can trap residue and make thorough cleaning harder. Cracks and failed joints may allow liquids to collect or reach areas beneath the surface. This can increase contamination risks and complicate safe scientific work. Include damaged edges, seams and cut-outs in routine inspections, not just the main work area.
Protect exposed areas where tasks create concentrated chemical contact. In areas with greater chemical exposure, protective mats, trays or overlays can add durability to acrylic solid surfaces. For example, a tray beneath a regularly used reagent bottle can limit direct contact with the bench. Choose protection that suits the task and does not obstruct cleaning or access.
Laboratory worktops are installed on suitable supporting structures, with joints and adjoining surfaces sealed to limit gaps. The installation should account for edges, wall junctions, sinks and equipment cut-outs. Use materials and sealants suited to the surface and cleaning products. For example, a poorly finished sink junction can become difficult to inspect and clean.
Maintenance starts with the correct cleaning method for the worktop and contaminant. Remove spills promptly in line with laboratory procedures, then clean the surface as scheduled. Inspect seals and edges for lifting, cracking or gaps. If damage appears, assess whether a repair can restore a smooth, cleanable finish or whether the affected section needs replacement.
Plan repairs around the work taking place. Clear the affected bench, protect nearby equipment and keep hazardous materials away from the repair area. For example, isolate a damaged section before staff resume routine sample handling. Maintain access to emergency equipment, including fire extinguishers, while work areas are temporarily rearranged.
A practical specification records the surface material, cleaning products, likely exposures and inspection points. That record helps facilities teams identify changes, such as a new chemical or repeated seal damage, before they become routine problems. It also gives maintenance staff a consistent basis for deciding whether to clean, repair or replace an affected area.
For a durable laboratory layout, explore worktop options suited to the demands of the space.
GEC Anderson Limited: Stainless Steel Worktops
GEC Anderson Limited supplies stainless steel worktops for projects where a durable, cleanable work surface is a priority. Its range also includes stainless steel sinks, cabinets and doors, and shelving, helping coordinate essential elements within a laboratory space. Products are available as standard, modular or made-to-measure to suit different project scales.
Consider stainless steel worktops when specifying a laboratory surface, then assess the required dimensions, adjoining sink and storage needs, and cleaning routine. Material selection still needs to reflect the chemicals and procedures in the intended setting. A considered specification connects the work surface with how the room will be used day to day.
For a laboratory project, contact GEC Anderson Limited to discuss stainless steel worktops and related requirements.
Turn your surface specification into a project plan
Specifying hygienic laboratory work surfaces is a practical design decision that also shapes how the room will function over time. The next step is to turn the intended work, cleaning routines and layout into a clear project specification. Consider how the worktop relates to sinks and storage, and how staff will use the space during routine tasks. A coordinated design clarifies those relationships before materials and dimensions are finalised.
GEC Anderson Limited supplies stainless steel worktops, sinks, cabinets and doors for laboratory projects. These products can form part of a considered scheme, with the work surface selected in relation to the tasks and surrounding fixtures. Bring your project requirements together, including the intended use and key layout decisions, then discuss the specification with the team.
Contact GEC Anderson Limited to discuss your laboratory worktop requirements and take the next step towards a well-considered design.
Frequently Asked Questions
What materials are suitable for hygienic laboratory work surfaces?
Suitable materials depend on the work, cleaning routine and likely exposure. Stainless steel, epoxy resin and phenolic resin are options to assess for benches, while sheet vinyl and epoxy resin are examples for laboratory floors. For instance, a sample-preparation bench and a floor near chemical handling may need different specifications. Compare each candidate’s compatibility with the actual substances and cleaning products used in that area.
Which chemicals and disinfectants should laboratory work surfaces resist?
There isn’t one universal list: surfaces should suit the chemicals and disinfectants used in their specific setting. Start by recording routine reagents, spill-response products and cleaning agents, then assess compatibility for the relevant material. For stainless steel, chloride-containing substances such as salt can cause point-etching, so remove them immediately. Concentrated mineral and organic acids can also cause corrosion. Follow the surface manufacturer’s cleaning guidance.
How should laboratory work surfaces be selected for different laboratory types?
Select surfaces around the procedures, samples and cleaning practices in each room. A clinic processing patient specimens may prioritise a layout that supports its established decontamination routine. A research laboratory using varied reagents should map chemical exposure to individual work areas. For example, a bench used for biological-agent handling has different operational requirements from one used for instrument preparation. Specify each location according to its tasks, rather than applying one assumption throughout.
Which UK suppliers offer hygienic laboratory work surfaces?
GEC Anderson Limited supplies stainless steel worktops for laboratory projects, alongside stainless steel sinks, cabinets and doors, and shelving. These products can support a coordinated specification where the work surface and surrounding fixtures need to work together. For example, a project may require a worktop planned in relation to a sink and nearby storage. Discuss the intended use and layout when developing a suitable product specification.