

Can a single millimetre really be the difference between an architectural masterpiece and a costly fabrication failure? When you’re commissioning a bespoke, single-piece surface that can span up to five metres in length, the margin for error is practically non-existent. It’s entirely understandable to feel a sense of trepidation regarding the logistics of integrated sinks or the alignment of complex returns. You want a result that feels permanent and purposeful, not a collection of compromises.
We’ve mastered the art of precision manufacturing since 1962, and we know that a seamless finish begins long before the steel is cut. This guide will show you exactly how to measure for a stainless steel worktop with the technical rigour required for a perfect installation. You’ll gain a clear understanding of the CAD verification process and the essential substrate preparation needed to support these substantial units. By following this methodical approach, you’ll ensure your site is ready for a professional, join-free worktop that reflects the highest standards of British craftsmanship and stands the test of time.
Key Takeaways
- Understand the role of CAD verification in bridging the gap between initial site measurements and precision fabrication.
- Discover how to measure for a stainless steel worktop while accounting for integrated Series A sinks and specific utility placements.
- Prepare your site structurally by ensuring cabinetry is perfectly level to support seamless units that can reach up to 5 metres in length.
- Evaluate logistical requirements, including lift and stairwell access, to ensure the safe delivery of large-scale bespoke surfaces.
- Establish correct maintenance habits from day one, specifically the requirement to rinse surfaces with cold water and dry with a soft cloth.
The Significance of Precision in Professional Kitchen Worktop Installation
Stainless steel is an unforgiving material in the best possible sense. Unlike timber or laminate, which allow for minor on-site adjustments with a plane or a saw, a bespoke steel surface is immutable once it leaves the factory. This inherent rigidity is why learning how to measure for a stainless steel worktop requires a transition from approximate dimensions to absolute technical precision. There’s no room for “near enough” when you’re installing a surface designed to last for half a century. Precision isn’t just a preference; it’s a structural requirement for a material that doesn’t compromise.
The primary advantage of our made-to-measure approach is the total elimination of unhygienic on-site seams. We specialise in seamless units that span up to 5 metres in length, a feat that modular alternatives cannot match. By removing the need for silicone-filled joins, we remove the primary breeding ground for bacteria and the most common point of structural failure. It’s this commitment to a join-free finish that elevates a worktop from a simple kitchen component to a piece of architectural infrastructure. A bespoke worktop is a functional work of art, and its beauty relies entirely on the accuracy of the initial template.
The CAD Drawing Approval Process
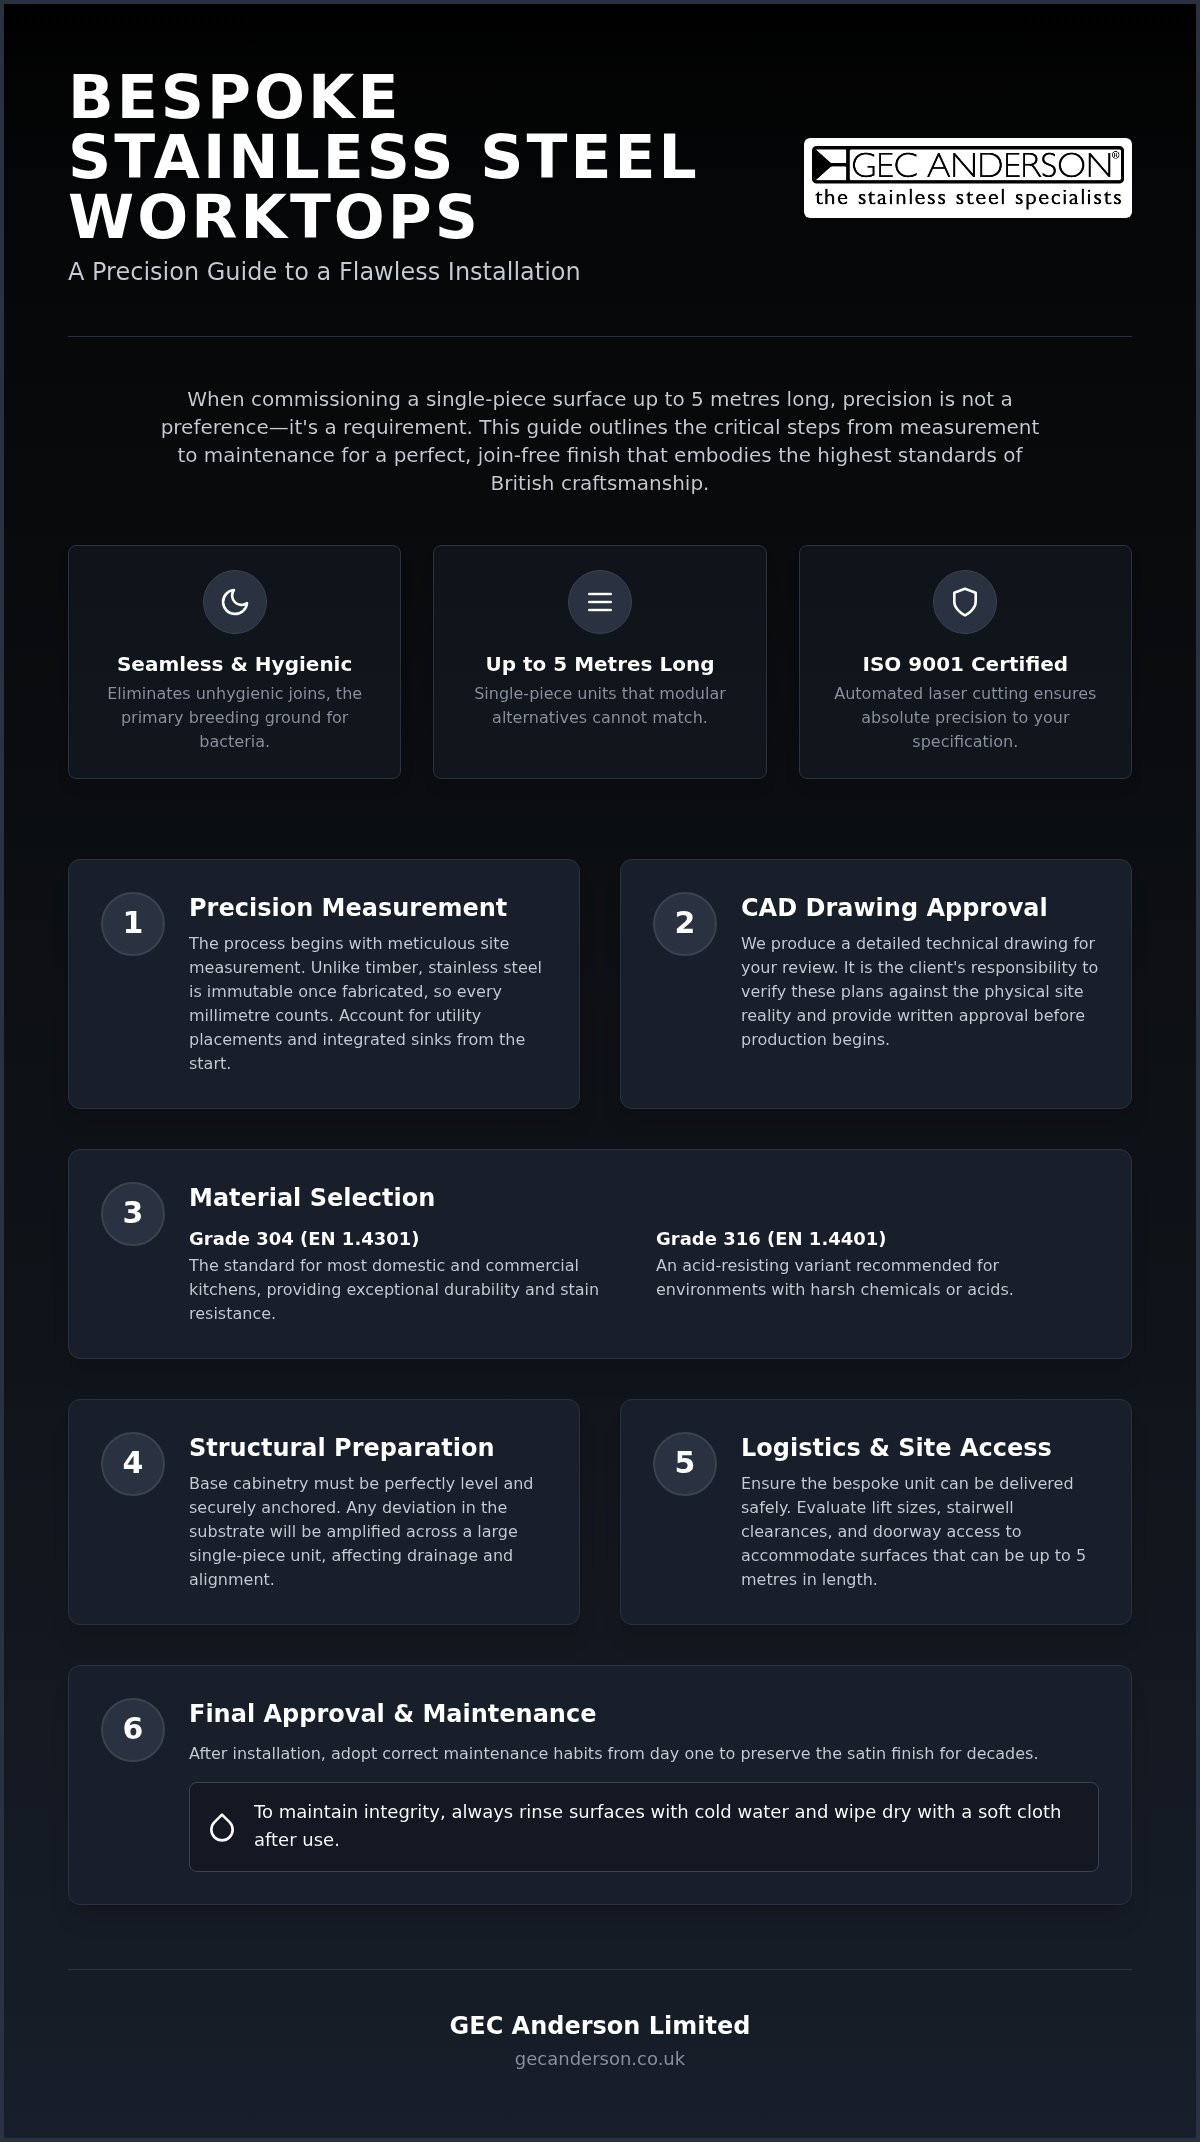
Every project we undertake includes a rigorous pre-production CAD verification phase. This isn’t just a formality; it’s the definitive safety net for your project. After you provide the initial dimensions, we produce a detailed technical drawing that maps out every millimetre of the proposed unit. It’s the client’s responsibility to verify these drawings against the physical site reality, checking for any discrepancies in wall squareness or utility placement. Once you’ve provided written approval, our ISO 9001-certified facility uses automated laser cutting to ensure the final product matches your specification exactly. This process ensures that the technical precision of our manufacturing aligns perfectly with your site’s unique geometry.
Material Selection: Grade 304 vs Grade 316
Specifying the right alloy is vital for the long-term integrity of the installation. For most domestic and commercial kitchens, Grade 304 (EN 1.4301) provides exceptional durability and stain resistance. However, in environments where the surface might encounter harsh chemicals or acids, we recommend Grade 316 (EN 1.4401), an acid-resisting variant. Understanding the material properties of stainless steel helps in selecting the right grade for your specific project’s demands. We typically utilise a material gauge between 1mm and 2mm, which is selected by the factory to provide the necessary structural rigidity based on the scale of your bespoke unit. Seamless edges and integrated returns represent the pinnacle of hygienic design by ensuring there are no crevices where grime can accumulate.
Structural Site Preparation: Ensuring Levels and Substrate Integrity
Achieving a flawless installation depends entirely on the structural readiness of your kitchen environment. Before considering how to measure for a stainless steel worktop, you must ensure the base cabinetry is perfectly level and securely anchored to the floor or wall. Any deviation in the substrate will be amplified across a single-piece unit, potentially leading to drainage issues in integrated sinks or visible gaps at the wall interface. Unlike timber or laminate, bespoke stainless steel cannot be shimmed or adjusted at the point of installation to compensate for a sagging floor or misaligned units.
It’s vital that floor levels are finalised before taking final measurements. Even a few millimetres of floor height change can affect the alignment of splashbacks and appliance heights. For those using our DECIMETRIC® modular system, planning should occur in 100mm increments to maximise the efficiency of the layout. While official building inspection requirements often focus on safety and structural stability, our technical standards require a substrate that remains rigid under the weight of the worktop. This prevents deflection that could compromise the satin finish or the integrity of integrated components over time.
Cabinetry and Base Unit Alignment
Base units must be levelled across the entire run using a precision spirit level or laser. Check for consistency at the front, back, and across the corners of every cabinet to prevent “bowing” of the steel surface. If you’re pairing your surface with bespoke stainless steel kitchen units, the integration is often more straightforward as the tolerances are designed to match. Once fixed, these units provide the stable, non-combustible platform required for a high-end installation. Ensuring splashback areas are flat and free from protrusions like redundant pipework or uneven plaster is equally essential for a flush fit.
Managing Returns and Corner Joins
When measuring for L-shape or U-shape configurations, note that the maximum return for a single-piece L-shape is 2.3 metres. Beyond this dimension, a technical join will be required. Ensuring that internal corners are exactly 90 degrees is critical for seamless integration. If your design incorporates a textured finish, you must account for the specific sheet size constraints of 2.4 x 1.15 metres during the measuring phase. For complex layouts involving multiple returns, it’s often helpful to consult our technical support team to verify the feasibility of your dimensions before the CAD process begins.
Managing Utilities and Appliance Integration Before Fitting
Integrating essential services requires a foresight that transcends simple linear dimensions. When considering how to measure for a stainless steel worktop, you must account for the precise exit points of plumbing, gas, and electrical feeds. Unlike standard off-the-shelf surfaces, a bespoke stainless steel unit is fabricated with pre-cut apertures for hobs and tap holes, meaning there’s no opportunity to relocate these openings once the steel has been laser-cut. This level of integration ensures a hygienic, watertight finish but demands that all utility positions are finalised during the initial site survey.
Coordination with third-party appliances is a critical component of the CAD phase. You’ll need to provide exact technical data sheets for any hobs, pop-up sockets, or specialist equipment intended for integration. These documents allow our designers to calculate the necessary clearances for cooling fans and structural supports. In professional and high-end residential kitchens, the fire-resistant nature of stainless steel provides an essential safety barrier behind high-output cooking zones.
Plumbing for Integrated Sinks
The positioning of waste pipes must be meticulously aligned with the specific bowl sizes selected, such as our A40 or A55 Series A models. Because these bowls are welded into the surface to create a seamless transition, the plumbing must accommodate the exact depth and centring of the waste outlet. Referencing our guide on bespoke stainless steel sinks will help you determine the necessary tap-landing widths and overflow requirements. Ensure all tap hole positions are marked on your initial sketches, as these are precision-drilled at the factory to guarantee a leak-proof fit.
Electrical and Gas Safety Clearance
Electrical outlet placement is particularly vital when specifying integrated splashbacks or wall panels. Industry guidance recommends that sockets are placed at least 300mm horizontally from the edge of a sink or draining board to prevent water ingress. When planning for wall-mounted shelving systems, such as the V90 system, you must verify that the wall substrate can support the combined weight of the shelving and its contents. For gas hobs, ensure that the cut-out dimensions account for the manufacturer’s specified safety clearances from combustible materials, even though the stainless steel surface itself is non-combustible.
- Finalise all tap hole diameters (typically 35mm) before CAD approval.
- Verify that under-mount clearance is sufficient for oversized sink bowls.
- Confirm the exact footprint of the hob to ensure the worktop’s internal support frame doesn’t interfere with the appliance’s housing.
- Ensure electrical back-boxes are recessed to the correct depth for a flush splashback fit.
Logistics and Site Access for Large-Scale Stainless Steel Units
Measuring for a bespoke surface involves more than the final installation footprint. When you are determining how to measure for a stainless steel worktop, you must also measure the building’s access points. A single-piece unit of up to 5 metres represents a significant logistical undertaking. It’s imperative to assess the entire delivery path, from the vehicle offloading point to the final kitchen position. This includes verifying the dimensions of lift interiors, the radius of stairwell turns, and the width of tight corridors.
Failure to account for these physical constraints can lead to costly delays or the inability to deliver the unit at all. Coordinated, on-time deliveries are essential to avoid site congestion, particularly on busy urban projects where skip placements or other trades might obstruct the path. Large-gauge steel units are substantial in weight. You must ensure adequate manpower or mechanical lifting equipment is available on-site for safe handling and positioning.
Handling 5-Metre Seamless Worktops
Identifying pinch points early in the planning phase is crucial. A 5-metre unit requires a clear, straight run or very wide turning circles. If your project includes bespoke stainless steel kitchen island tops, remember that these often require 360-degree access for both delivery and positioning. Manual handling of heavy-duty steel must follow strict safety protocols to protect both the installers and the integrity of the satin finish. Even a minor impact against a door frame during transit can cause irreparable damage to a finished edge.
Site Conditions on Delivery Day
The installation zone must be cleared of other trades and debris before the unit arrives. A clean, dry area is required for unboxing and the final site inspection. Once the worktop is on-site but before it’s fixed, it should be protected with appropriate coverings to prevent scratches from tools or dust from ongoing construction. Since these are high-value architectural fixtures, ensuring the site is secure is a priority. For detailed technical support regarding delivery logistics, you can contact our specialist team to discuss your specific site requirements.
Final Approval and Post-Installation Maintenance Protocols
The completion of a bespoke installation marks the transition from technical specification to long-term ownership. Whilst the primary focus of this guide has been how to measure for a stainless steel worktop, the final approval process is where your precision planning is validated. A successful project concludes with a thorough inspection of the satin finish and all seamless joins. You’re looking for the “work of art” quality that defines a GEC Anderson surface, ensuring that the transitions between the worktop and integrated components are flawless. Mastering how to measure for a stainless steel worktop ensures that this final sign-off is a celebration of precision rather than a correction of errors.
It’s essential to perform an immediate post-installation clean to remove fingerprints and any lingering construction grime. This initial care sets the standard for the surface’s 50-year lifecycle. You should verify that all integrated Series A sinks drain correctly and that no debris from the installation remains in the waste outlets. This hand-over is also the ideal time to establish the correct maintenance habits with the end-user to prevent common surface issues caused by improper cleaning techniques.
The Essential Cleaning Procedure
You must adhere to a strict “Cold Water Only” protocol for all rinsing. Whilst many general guides suggest warm soapy water, this is a mistake for high-grade stainless steel. Warm water and air-drying are the primary causes of surface discolouration and spotting. You should always rinse with cold water and dry immediately with a soft cloth to preserve the surface’s integrity. Don’t leave the surface to air dry. When cleaning, always follow the direction of the grain; this methodical approach prevents micro-scratches and maintains the characteristic satin lustre that defines a premium installation.
Long-Term Care and Calcium Removal
Over time, you may encounter calcium deposits or surface rust. These aren’t defects in the steel itself; they’re typically the result of hard water or contact with foreign iron materials, such as carbon steel wool or cast-iron cookware. For calcium removal, we recommend using vinegar, 10% acetic acid, or a 1:4 diluted nitric acid solution. If surface rust appears due to iron contamination, a dry cleaning powder is the most effective remedy. For further insights into material selection and long-term durability, consult our Bespoke Stainless Steel Kitchen Worktops: The Architect’s Guide to Specification. Proper care ensures your investment remains an aseptic and beautiful centrepiece for decades.
Securing the Precision of Your Bespoke Installation
Achieving a seamless, join-free kitchen environment relies on a methodical transition from site measurements to technical fabrication. By prioritising structural levels and coordinating utility placements early, you eliminate the risks associated with large-scale installations. We’ve seen that the CAD drawing process acts as a vital safety net, ensuring every millimetre is accounted for before our ISO 9001-certified facility begins production.
Mastering how to measure for a stainless steel worktop is the first step in acquiring a surface with a typical 50-year product lifecycle. This technical rigour ensures your bespoke unit remains a hygienic and permanent architectural fixture. We provide detailed CAD drawings with every order to guarantee that the final product aligns perfectly with your site’s reality. It’s this commitment to precision that transforms a standard kitchen into a professional-grade space.
If you’re ready to integrate professional-grade durability into your project, request a technical quotation for your bespoke project. Our team is here to support your specification with technical wisdom and steady guidance. We look forward to helping you create a functional work of art that stands the test of time.
Frequently Asked Questions
Can I install a 5-metre stainless steel worktop in a residential kitchen?
Yes, we manufacture seamless worktops up to 5 metres in length for both residential and commercial applications. The primary consideration isn’t the kitchen size, but the building’s access points. You must verify that lift capacities and stairwell turns can accommodate such a significant single-piece unit. When planning how to measure for a stainless steel worktop of this scale, always account for the delivery path from the vehicle to the final installation zone.
How do I ensure my base cabinets are strong enough for stainless steel?
Base cabinets must be perfectly level and securely fixed to the floor or wall to provide a stable substrate. We select the steel gauge, typically between 1mm and 2mm, based on the unit’s dimensions to ensure structural rigidity. It’s vital that the cabinetry doesn’t deflect under the weight of the worktop. Ensuring your units are correctly aligned prevents drainage issues in integrated sinks and maintains the integrity of the satin finish.
What is the correct way to clean a GEC Anderson worktop after installation?
To remove installation grime and fingerprints, apply a general-purpose cream cleaner like Cif to a damp cloth or sponge. You must always follow the grain of the stainless steel to preserve the shine and prevent micro-scratches. After cleaning, rinse the surface thoroughly with cold water and dry it immediately with a soft cloth. Don’t leave the surface to air dry, as this can cause unsightly spotting or discolouration.
Why must I only use cold water to rinse my stainless steel sink?
Rinsing with cold water is essential because warm or hot water can lead to surface discolouration and the accumulation of grime. Synthetic detergents left in contact with warm steel often cause dullness that is difficult to remove. By using cold water and drying immediately with a soft cloth, you maintain the aseptic properties of the material. This simple protocol is a critical part of the maintenance required for a 50-year product lifecycle.
What site measurements are required for a bespoke L-shaped worktop?
You need to provide the exact length of both runs and the required depth for each section. Keep in mind that the maximum return for a single-piece L-shaped worktop is 2.3 metres. You must also verify that internal corners are exactly 90 degrees. If you’re unsure how to measure for a stainless steel worktop with complex returns, our technical team can provide guidance before we issue your pre-production CAD drawings.
How do I remove calcium deposits from my new stainless steel surface?
Calcium deposits should be removed using vinegar, 10% acetic acid, or a diluted nitric acid solution mixed at a ratio of one part acid to four parts water. Apply the solution to the affected area, then rinse thoroughly with cold water and dry with a soft cloth. If you use nitric acid, ensure the area is well-ventilated. Never use abrasive pads or warm water, as these will damage the professional satin finish.
Do I need a site visit for templating before ordering from GEC Anderson?
A site visit for templating isn’t always mandatory as we provide detailed pre-production CAD drawings for your approval based on the dimensions you supply. However, a site visit can be arranged if you require our professional installation services. This CAD-led process acts as a safety net, allowing you to verify every millimetre of the specification against the physical site reality before we begin the ISO 9001-certified manufacturing process.
Can stainless steel worktops be fitted over existing kitchen units?
Stainless steel worktops can be fitted over existing units if they’re structurally sound and perfectly level. Any sagging or misalignment in the old cabinetry will prevent the worktop from sitting flush and may cause issues with integrated drainage. You should also verify that the existing substrate can support the weight of the new steel unit without deflection. If the units are uneven, they must be adjusted or reinforced before installation.